Updated!! Easier way to put this together!!This is my new Star Tree Ornament! I used the Specialty Designer Series Paper, Christmas Cocoa Specialty(#116770) from the 2009-2010 Holiday Mini Catalog.

You will need:
5- 4"x4" pices of designer double sided paper
mini glue dots, sticky strip or tombow adhesive
paper snips
1 brad with crop-o-dile or way to set it and string to hang up
Here is how to make it:
Cut a 4"x4" paper out of designer series paper.(Mine is out of plain white paper so you can see the folds and cuts easier)
Fold it in half diagonally.

Then fold it in half again

You will cut into the side that has the red arrow in the picture above.
I cut in 3 times about 3/8" apart each time. If you want your star to have more loops you can make more cuts. You are going to cut into the folded side.
After you make your cuts open it up to see your square, the cuts should look like this.

Next you will start attaching the cuts. You will need a good glue or tape. Snail adhesive works OK but since the papers are going to stay in tension I would recommend the red sticky strip tape, glue dots, or tombow adhesive.

You will put the adhesive where the letters are in the picture on only one side, either lower left or upper right. Then adhere to the other side with the same letter making a loop.
A1 will attach to A1, and A2 to A2 on one side.
B1 will attach to B1 and B2 to B2 on the other side. Refer to the photos below.


This is what you need to do to all five pieces. If you have double sided paper try to make the loops of the same sizes showing the same sides for all 5.
That way when you put it all together it has more of a pinwheel look.
Once they are all together you will fold the ends where they will attach to each other. I have the fold mark drawn with a dashed black line to show. Fold all five in the same direction.


You will then put glue or a glue dot on one side of the triangle folded piece and stick it to the next one that looks the same. You will continue until all five are glued together to make the star. Remember to put all of the loops going in the same direction.
Notice in the photo below that that are all joined in the center.

Then all you have to do is put a brad in the top of one of the pieces and thread a string or ribbon through to hang it on your tree!
Try this same project with Printed Window Sheets for a great new look! You can find them in the 2009-2010 Holiday Mini Catalog on page 27(#116805). You will have to cut one at a time with a template because they are plastic.
Follow the directions above to make a template our of cardstock and use it as a guide to cut through the window sheets.





 Swap Garden Bag
 Star Cards/Box
 Fun Frames
 Treasure Box, Card
 Fun Folds Open Sea
 Glider Card
 Nurse Box & Cards
 Race Car Box
 Castle Frame
 Egg Gift Card
 Bug Cards
 Tux card
 Flip Calendar
 Photo CD Album
 Gingerbread Box
 Gift Card Holder
 Fold Scrapbook
 Diabetes Purse
 X-mas Cards
 Haunted House
 Chef Pop-out
 Chef Pop-out
 Owl Cards 2
 Spooky Punches
 Foliage Box+Cards
 Owl Purse +Cards
 Bus, Fire, Police
 Briefcase & Cards
 Cylinder Purse
 AE 3 Cards
 Pie Box&Card
 Potato Heads
 Castle Album
 Scrapbook Album
 Scrapbook Album
 Purse & Wallet
 Jar Cards
 Animal Cards
 Barn & Cards
 Gardeners Bag
 Picnic Basket
 Cupcake cup
 Chocolate Candy
 Bird in Cage
 Pool Table
 Wheelbarrow
 Bird Cards#2
 Jewelry Box
 Clock Game
 Purse & Cards
 Rag Purse
 Teapot and Cards
 Sheep box & cards
 Egg Box & Chicks
 Doctor's Bag
 Pop-out Flower
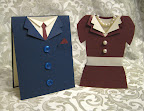 Suit Dress Card
 Explosion Box
 Vest Card
 Tackle Box
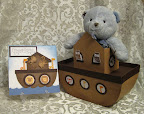 Noah's Ark
 Love Coupon
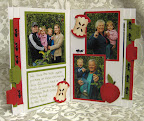 Pull-out Scrapbook
 Calendar Book
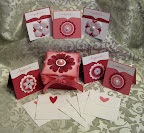 Card Box
 Cupcake Box
 Photo Box
 Woven Basket
 Six Pack Baby Jars
 Scrapbook
 Scrapbook
 Santa Wine
 Top Note Album
 Top Note Album
 Decorative Candles
 Origami Cube-Box
 Origami Album


